Photos of Offset-Head style Stills
The Offset-Head still (sometimes refered to as the Nixon-Stone) is capable of producing 96% pure alcohol. The design is available either at http://www.gin-vodka.com or http://www.home-distilling.com/Some of the photos here show the design modified in a number of ways ...
| Gregs Miraculous Polypipe Still | |
| Greg makes (and sells) a version made from simple polypropylene piping.
Email him at greg@thedenehys.com
I also have an advert & testimonial about it that you can download : SimpleStill.pdf |
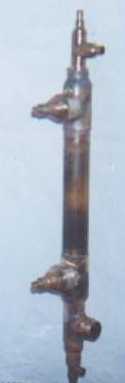
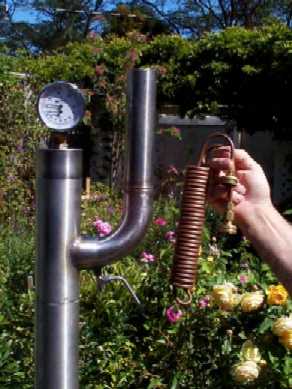
| JourneyMans Vapour Management Still Head | |
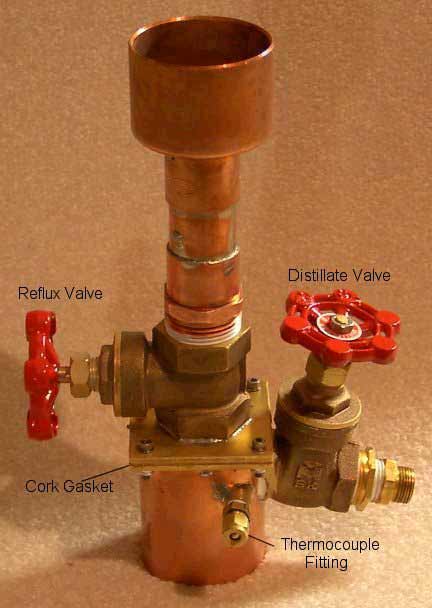
| As per Nixon & McCaws "The Compleat Distiller" at
http://www.amphora-society.com Attached is a picture of my new Vapor-Management still head. It sits on top of a copper-scrubber-packed column and a standard coiled-copper reflux condenser goes on top. (2" tubing for column and reflux condenser.) The safety bypass is on the back of the head / not in this picture - EXTREMELY IMPORTANT. Here's the design criteria:
|
Mike explains a bit more about how the Vapour Management head works ...
-
If you feed vapour to the middle point of a horizontal tube, then it will split into two streams.
If the cross-sectional area of one arm of the tube is A and the other is B, then the vapour will divide in that ratio, A/B.
You can control that cross-sectional area by means of gate valves, and this is useful for some applications.
If you feed vapour into the middle point of a vertical tube, density now becomes a factor and this can be used to control the behaviour of a distilling column depending on the composition of the vapour inside. First thing to note is that vapour rises in a distillation column not because if convection, as some think, but because it is pushed by vapour generated in the boiler. All vapour in a distillation column therefore rises at the same rate no matter what its density, and at a rate determined by the power pumped into the boiler.
When vapour meets the middle point of the vertical tube, some will be driven further up the column and some will enter the tube. In practise, this middle feed point is sealed off by a gate valve in a side arm during stabilisation of the column, and the vertical tube comprises the path up to the top condenser and the path down to the product condenser. It is a 'kinked' vertical tube fed with vapor at its middle point. When the gate valve is opened, vapour enters the side arm and, if it is less dense than air, will try to rise. If it is denser than air then it falls. It cannot rise in the side arm as that arm only goes down, but can fall as it points down to the product condenser and collecting vessel. The gate valve controls amount that can enter the side arm. The relative densities of steam at 100C, air at room temperature, and ethanol vapor at 78C are 0.6/1.0/1.6 If the vapour in the column is ethanol, then it will fall down through the product arm, and if it is steam then it will continue up to the top condenser.
The changeover point, when the vapor in the column is the same density as air, if when the vapour comprises 45.5% ethanol and 54.5% steam. The volume of vapour falling down through the side arm therefore tails off and finally stops as the vapour mix in the column approaches and then reaches this point.
As this represents the onset of tails, the side arm being at the top of the column, a vapour management still automatically stops delivering product before it is contaminated with a significant amount of tails. It is also the reason why you cannot test the operation of such a still using steam alone. Subsequent collection of tails can be done by turning off the top condenser, blocking that path with a rag in the top vent, and fully opening the gate valve. A rag is recommended for blocking the top vent as a gate valve would present the possibility that both gate valves could be closed together, sealing the whole still.
| Mike Pemberton's Vapour Management Still email : bifrost@xtra.co.nz | |
| (no picture yet) | |
A brief description of my rig:
(as per Nixon & McCaws "The Compleat Distiller" at
http://www.amphora-society.com)
The second run started out at the greedy rate of 17 mls min. The only difference is that towards the end of the run as the output decreases so does the concentration. Near the end the rate drops off to 6mls min and down to 92% The only disadvantage with this new technique would be the time/difficulty in collecting the alcohol/congener mix (if indeed any useful alcohol is left in the wash). I would suggest that anybody adopting the Vapour management style retain their old method of collection when they re design their head. In order to switch from Vapour management collection to their old style at the end of the run. In conclusion, the method is superb for those who desire top quality product directly from the still without having to muck about with carbon treatment in order to get a potable product | |
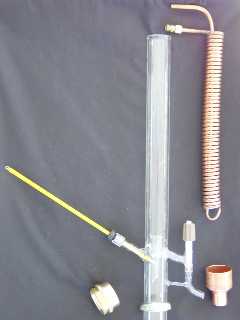
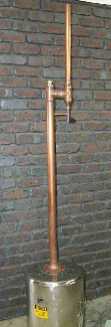
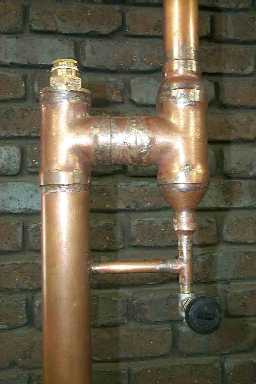
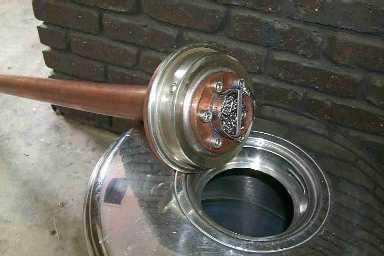
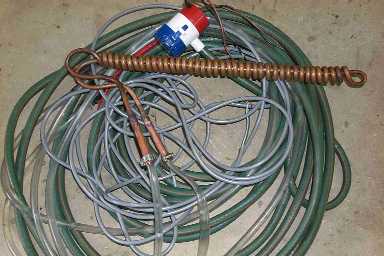
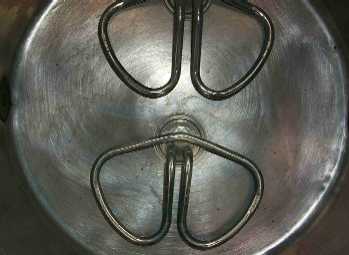
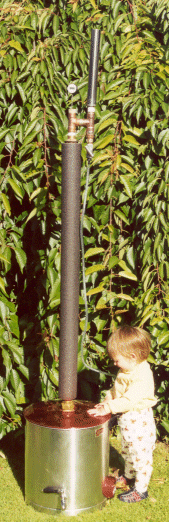
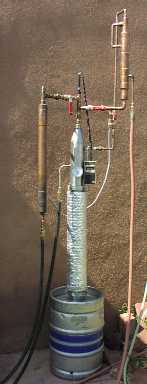
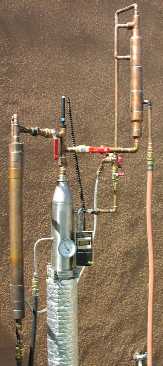
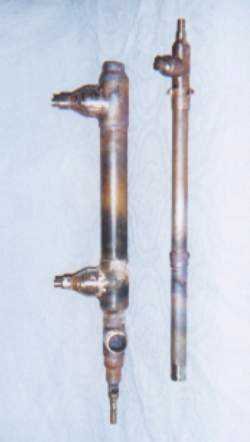
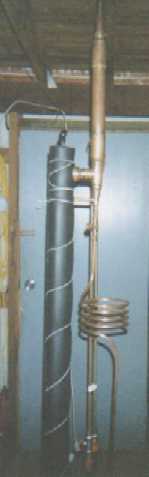
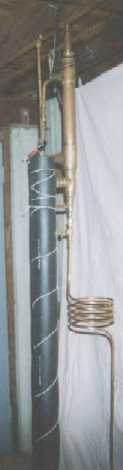
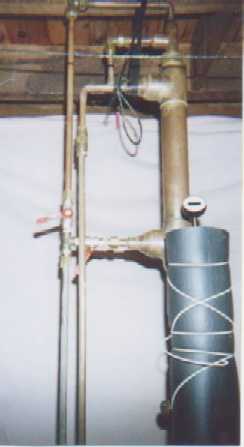
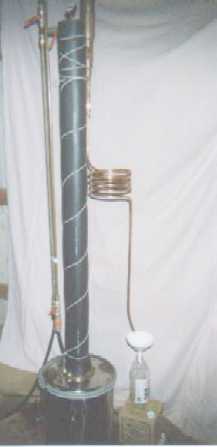
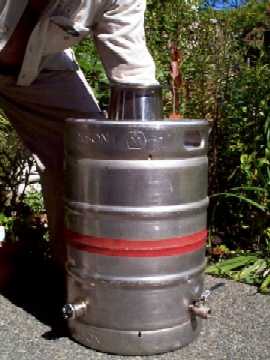
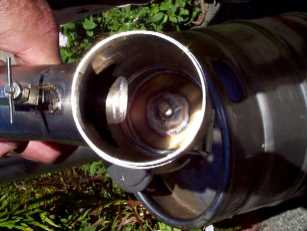
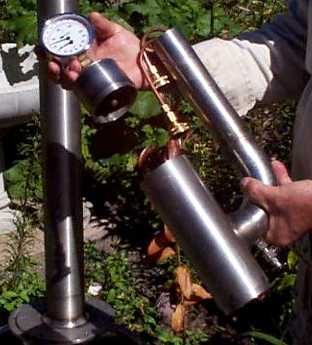
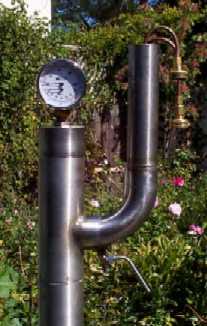
| Matt's Offset-Head Still |
|
I made the still from the Nixon-Stone design outlined in the great book: Making pure corn whiskey I highly recommend this book - it has great descriptions, information and almost all information I needed to build the still I made a few modifications to the design - the main one being the size of the copper pipe used to build the column/condenser. The book's design is for 1 1/4" pipe, I used 2" copper pipe, which almost doubles the volume of the column. Also, I am converting a 316 stainless steel drum for the boiler, rather than using a hot water service as suggested. A few other modifications have been made, outlined below. |
|
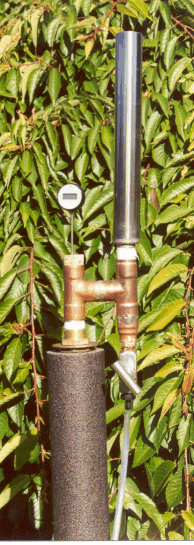
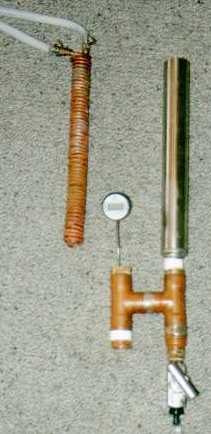
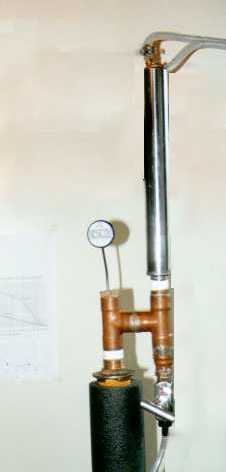
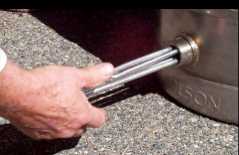
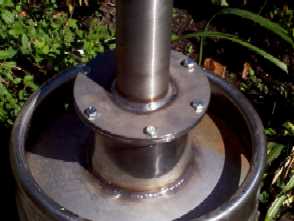
Column. The column is made from 2" Copper, and is 1200mm long. I've put a BSP tube join (male and female) between the column and head, which is made from brass, so I can easily remove the head. At the bottom of the column, there is another male 2" brass BSP tube fitting, which goes into the female 2" stainless steel BSP socket welded to the top of the boiler - so I can remove the column as well. The brass threaded fittings are known as a 2" Brass BSP Tube bush and come as either a male or female fitting, which gets soldered onto the end of the pipe. |
|
Boiler. The boiler is a 60L 316 Stainless drum, which Jan put me on to (thanks
Jan!!!!), and I've put 2 x 1380 watt elements in it. |
|
Nixon-Stone
Head. Again this is made from 2" copper pipe. Above and
below the T, there is a 50mm section of tube. On the bottom section, a
2"
Female BSP tube bush is soldered, and this screws on to the top of the
column. The top section has a 2" copper tube cap, with a 40mm
3/8" copper
pipe, attached to a series of compression fittings and adapters, eventually
to hold the 3mm stainless steel probe of the digital thermometer, via the
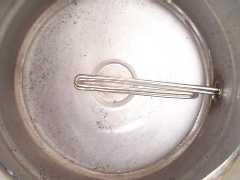
3mm brass compression fitting. Note: In the broken down photos of the head and head and column, the horizontal section going from the T to the elbow in the head is quite a lot longer than 40mm. This photo was taken before I shortened it, to decrease the tipping effect of having a full condenser a long way from the column. |
|
Condenser The condenser coil is made from 3/16" copper pipe, which was wound
to form the coils. I modified the condenser design so it is longer than the
design in the book, and also has a smaller internal coil at the top within
the main condenser coil, so any vapours reaching the top of the condenser in
theory get condensed rather than escaping. This removes the need for a
scrubber poked down the middle of the coil, as is often suggested with the
standard coil design. The intake pipe goes down 120mm inside the main coil,
then coils around itself back to the top to form this internal coil. This
then wraps around itself again, forming the main coil which extends all the
way down the condenser (360mm), and the returns through the middle of it
all. |
|
The whole
thing! The still stands 2.05 meters all up, bottom of drum to top of
condenser, but collapses down into pieces. The head can also attach directly
to the lid without the column, to use as a pot still for beer stripping. |
|
Running time, purity
etc Heat up: The boiler took 1:00 hour to heat a 25L
13.1% wash to boiling. |
|
Brass
treatment http://www.brewin fo.com/mybrewery97/mybrewery3.html After the first treatment, it seemed to work well, each step getting the fittings cleaner and more shiny, BUT.... After taking the fittings out, they went from shiny to dull with the typical green/blue tarnishing you see on old brass fittings - this took about 3 - 5 minutes. After a bit of experimenting, I found that if I put them back in the peroxide/vinegar solution, they lost the tarnishing, and got shiny again. This was the exact same solution - not a re-mix. I also found that leaving them in there for a longer time (around 12 minutes total) got them shinier, and also they fizzed in the solution (which didn't happen the first time). When I took them out, I quickly dried them with tissue paper toweling, and then with a cotton cloth. After this, they remained nice and shiny, except for the absolute bottom of the thread groves, in which I assume a small amount of solution remained. The solution went semi light blue colour (about half the intensity of the picture on the mybrewery web site). |


| Rob van Leuven's Offset-Head Column | ||||
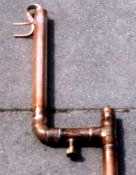
| ||||
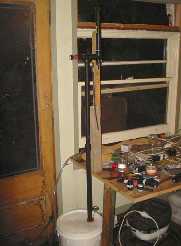
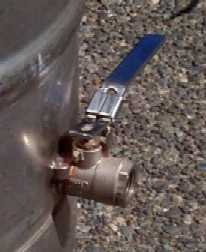
| Dicks Still | ||||
| This is how I fixed the problem of securing the tower to the top of my urn. The white disc is a painted disc of MDF clamped down onto the s/s urn top using 4 x 6mm threaded brass rods. These are fixed to the inset brass strip that secures the curved wooden slats forming the urn insulation. To seal the urn top I use a length of thin silicon rubber tubing, slit down its length and threaded round the disc's edge. The white cord fastened by the needle valve is just a bit of additional 'belt & braces'. | |||

|
|
Urn is a converted 40 liter SS tea urn. The urn is double skinned and is
insulated between the two walls of SS. There were no elements in the tank
when I obtained it. The two elements are 2400watt and 1500watt for fast boil
up. Power supply is three 240volt individually switched outlets. One outlet is a triac controlled. I boil up on full power and then switch off the 2400w and switch the 1500w to the triac plug and distill under triac control. The tower is 1200mm x 50mm diam measured from the base of tower to center of 50mm tee. The condenser housing is 40mm diam. The cooling coil is 600mm long x 8mm diam (about meters of tube to construct the coil). I think I have about 12ss scrubbers from the base to the top of the reflux return pipe (12mm diam) Insulation is 150mm black compressible plumbers foam. The insulation is held in place by a cotton sleeve fastened with Velcro. |
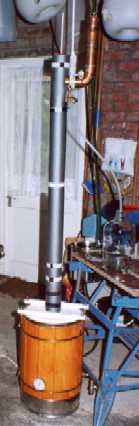
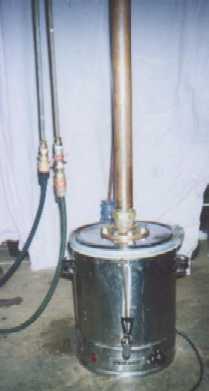
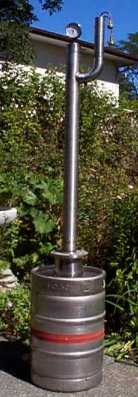
| My Still ! | ||||
| ||||
|
Size : 30 L Heat Input : 1800 W Column : 1.1 m x 1.5 inch diameter Packing : 12 pot scourers Condensor : 13 ft of 3/16 copper Purity : 95%+ at 40 mL/min Design : Nixon-Stone Cost : NZ$300 (US$120) | ||||
| Tom "the StillPastor"s Still email : THART@FIRSTPRESABQ.ORG | ||||

|
The pot is a 15.5 gallon beer keg with two 1" threaded inlets welded near
the bottom. This kettle is heated with two water heater elements- each a
1500 W 110 volt element. This may change, I will have to see as time goes
by. Suggestions are welcomed. The column is 3" in diameter and stands 1.25 meters tall with an internal cooling loop at about 1 meters The column is removable and has a perferated plate at the bottom. The column is also constructed in two parts, being divided just below the internal coil near the top. The lower meter of the column is insulated with boiler pipe insulation, and the column packed with S/S scrubbies up to the internal coil. The still actually has two heads. The first is the one I originally constructed, which is a simple pass through, jacketed condenser made of copper. This condenser is actually design so that water flows both around and through the consensing tube. It works great. The second is a new fractionating head also made of copper roughly based on a Nixon/Stone design. The actual design for this head is here. I included both heads on this still because I could and I enjoy having options, besides what else would I do with the old one? The various valves you see in the pictures are all ball valves to control the flow of the chilling water, vapor and distillate. I am able to run the still in a variety of configurations with this set-up and as I said earlier I enjoy having options to play with. The top of the column is open to accept the probe for my digital thermometer. In addition to my new electric kettle, I also have my original 10 gallon pot that is double walled and heated with hot water or steam depending on how I wish to run it. More options. | |||
| Ned Steamgoon's Still | ||||
|
The stillhead is based on Tom Hart's design from the Yahoo Distillers
group (see above) - it is 0.5 metres from the reflux needle valve to the water outlet
tube at the top. The vapour tube from the column and the main tube of the
condenser are 40mm, the outer jacket is 50mm. The inner core is 25mm and its
outlet tube is 12.5mm. Water enters the outer jacket at the top for
counterflow - the outlets of the inner and outer are each controlled by
their own ball valve. With the ball valves half open it does not get warm
any further than about 150mm up from the vapour inlet so it probably needs
be only half as high. The main column is 1200mm x 50mm packed with 13 jumbo SS scrubbers. The urn is rated at 2400 watts. It produces over 1.5 litres per hour at 93%. | |||
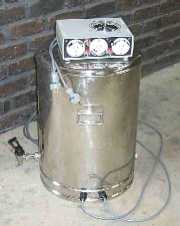
| Big Kahunah's Still : email : big_kahunah@hotmail.com | ||||
| ||||
| comments | ||||
| http://homedistiller.org This page last modified |